
Follow the steps to import and synchronize people between your organization in Huma and your Azure AD account.
Step 1: Register a new app in Azure AD
Step 2: Create a Client secret key
Step 3: Add API permission for your app (Only when using auth type Service to service)
Step 4: Connect Huma to Azure AD
Step 5: Activate the integration
1. Register a new app in Azure AD
- Log in to your Azure AD account
-
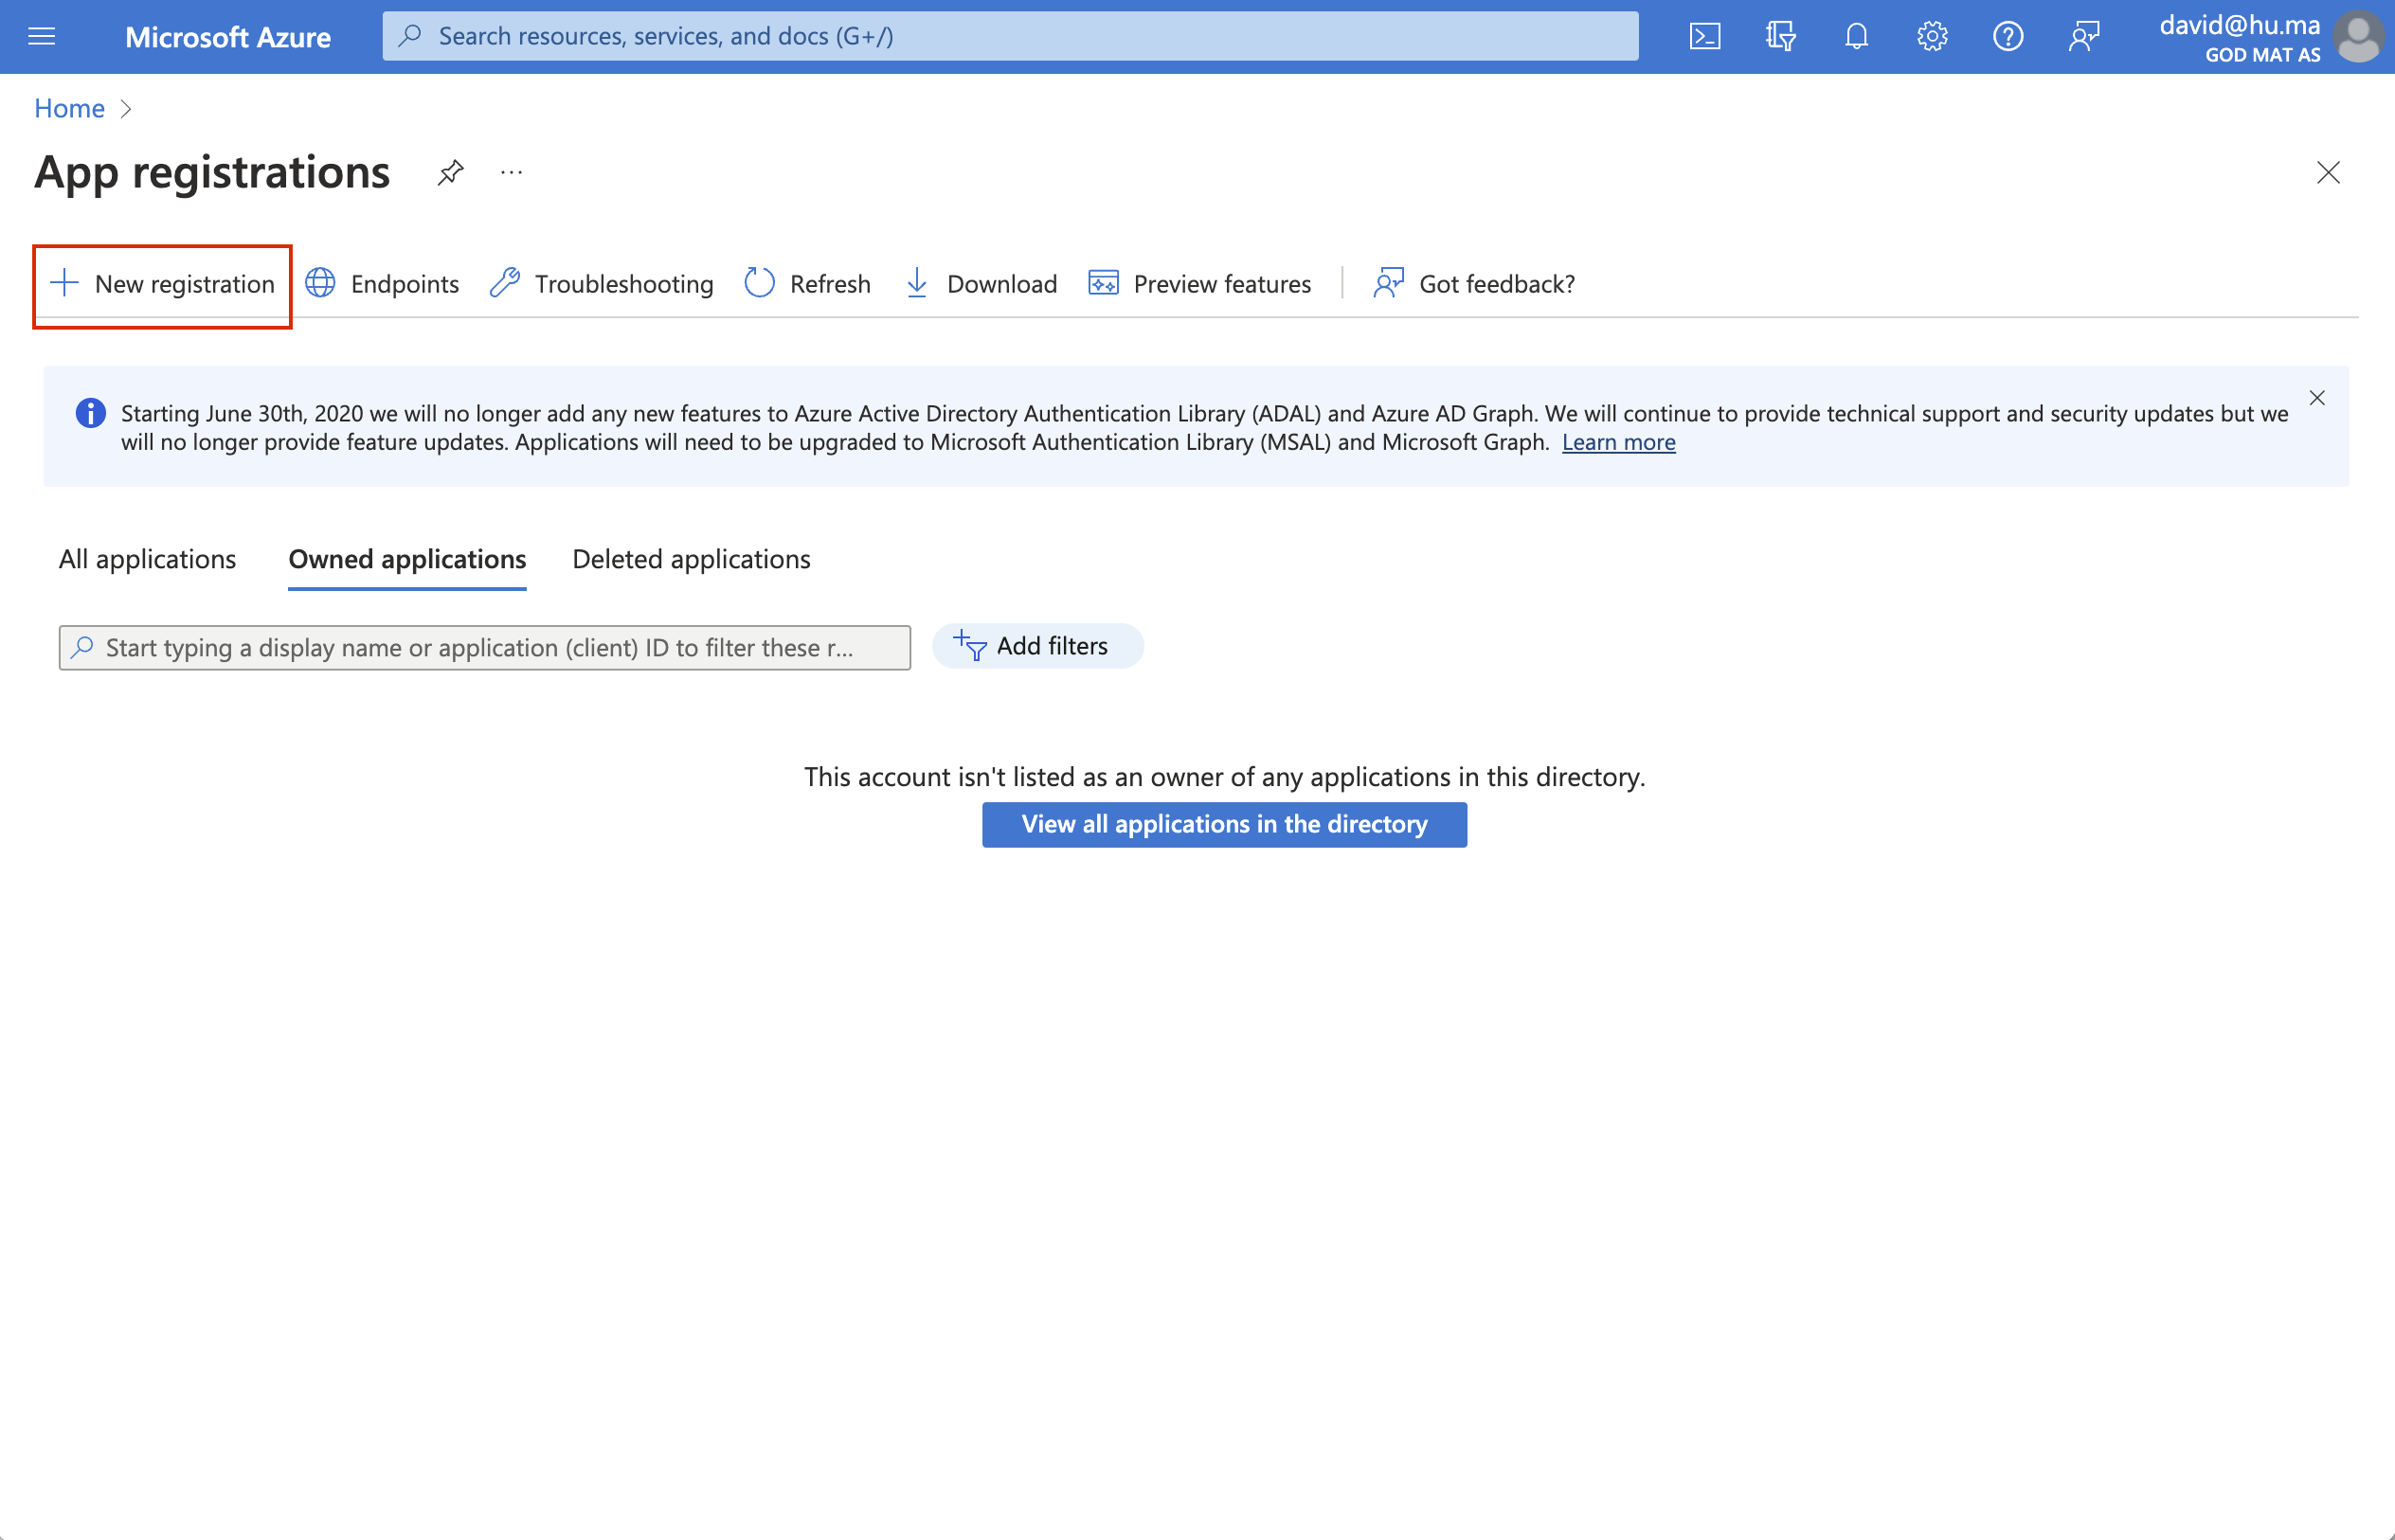
In the top search bar, enter 'App registrations' and click on the search result.
-
Click on the 'New registration' button.
-
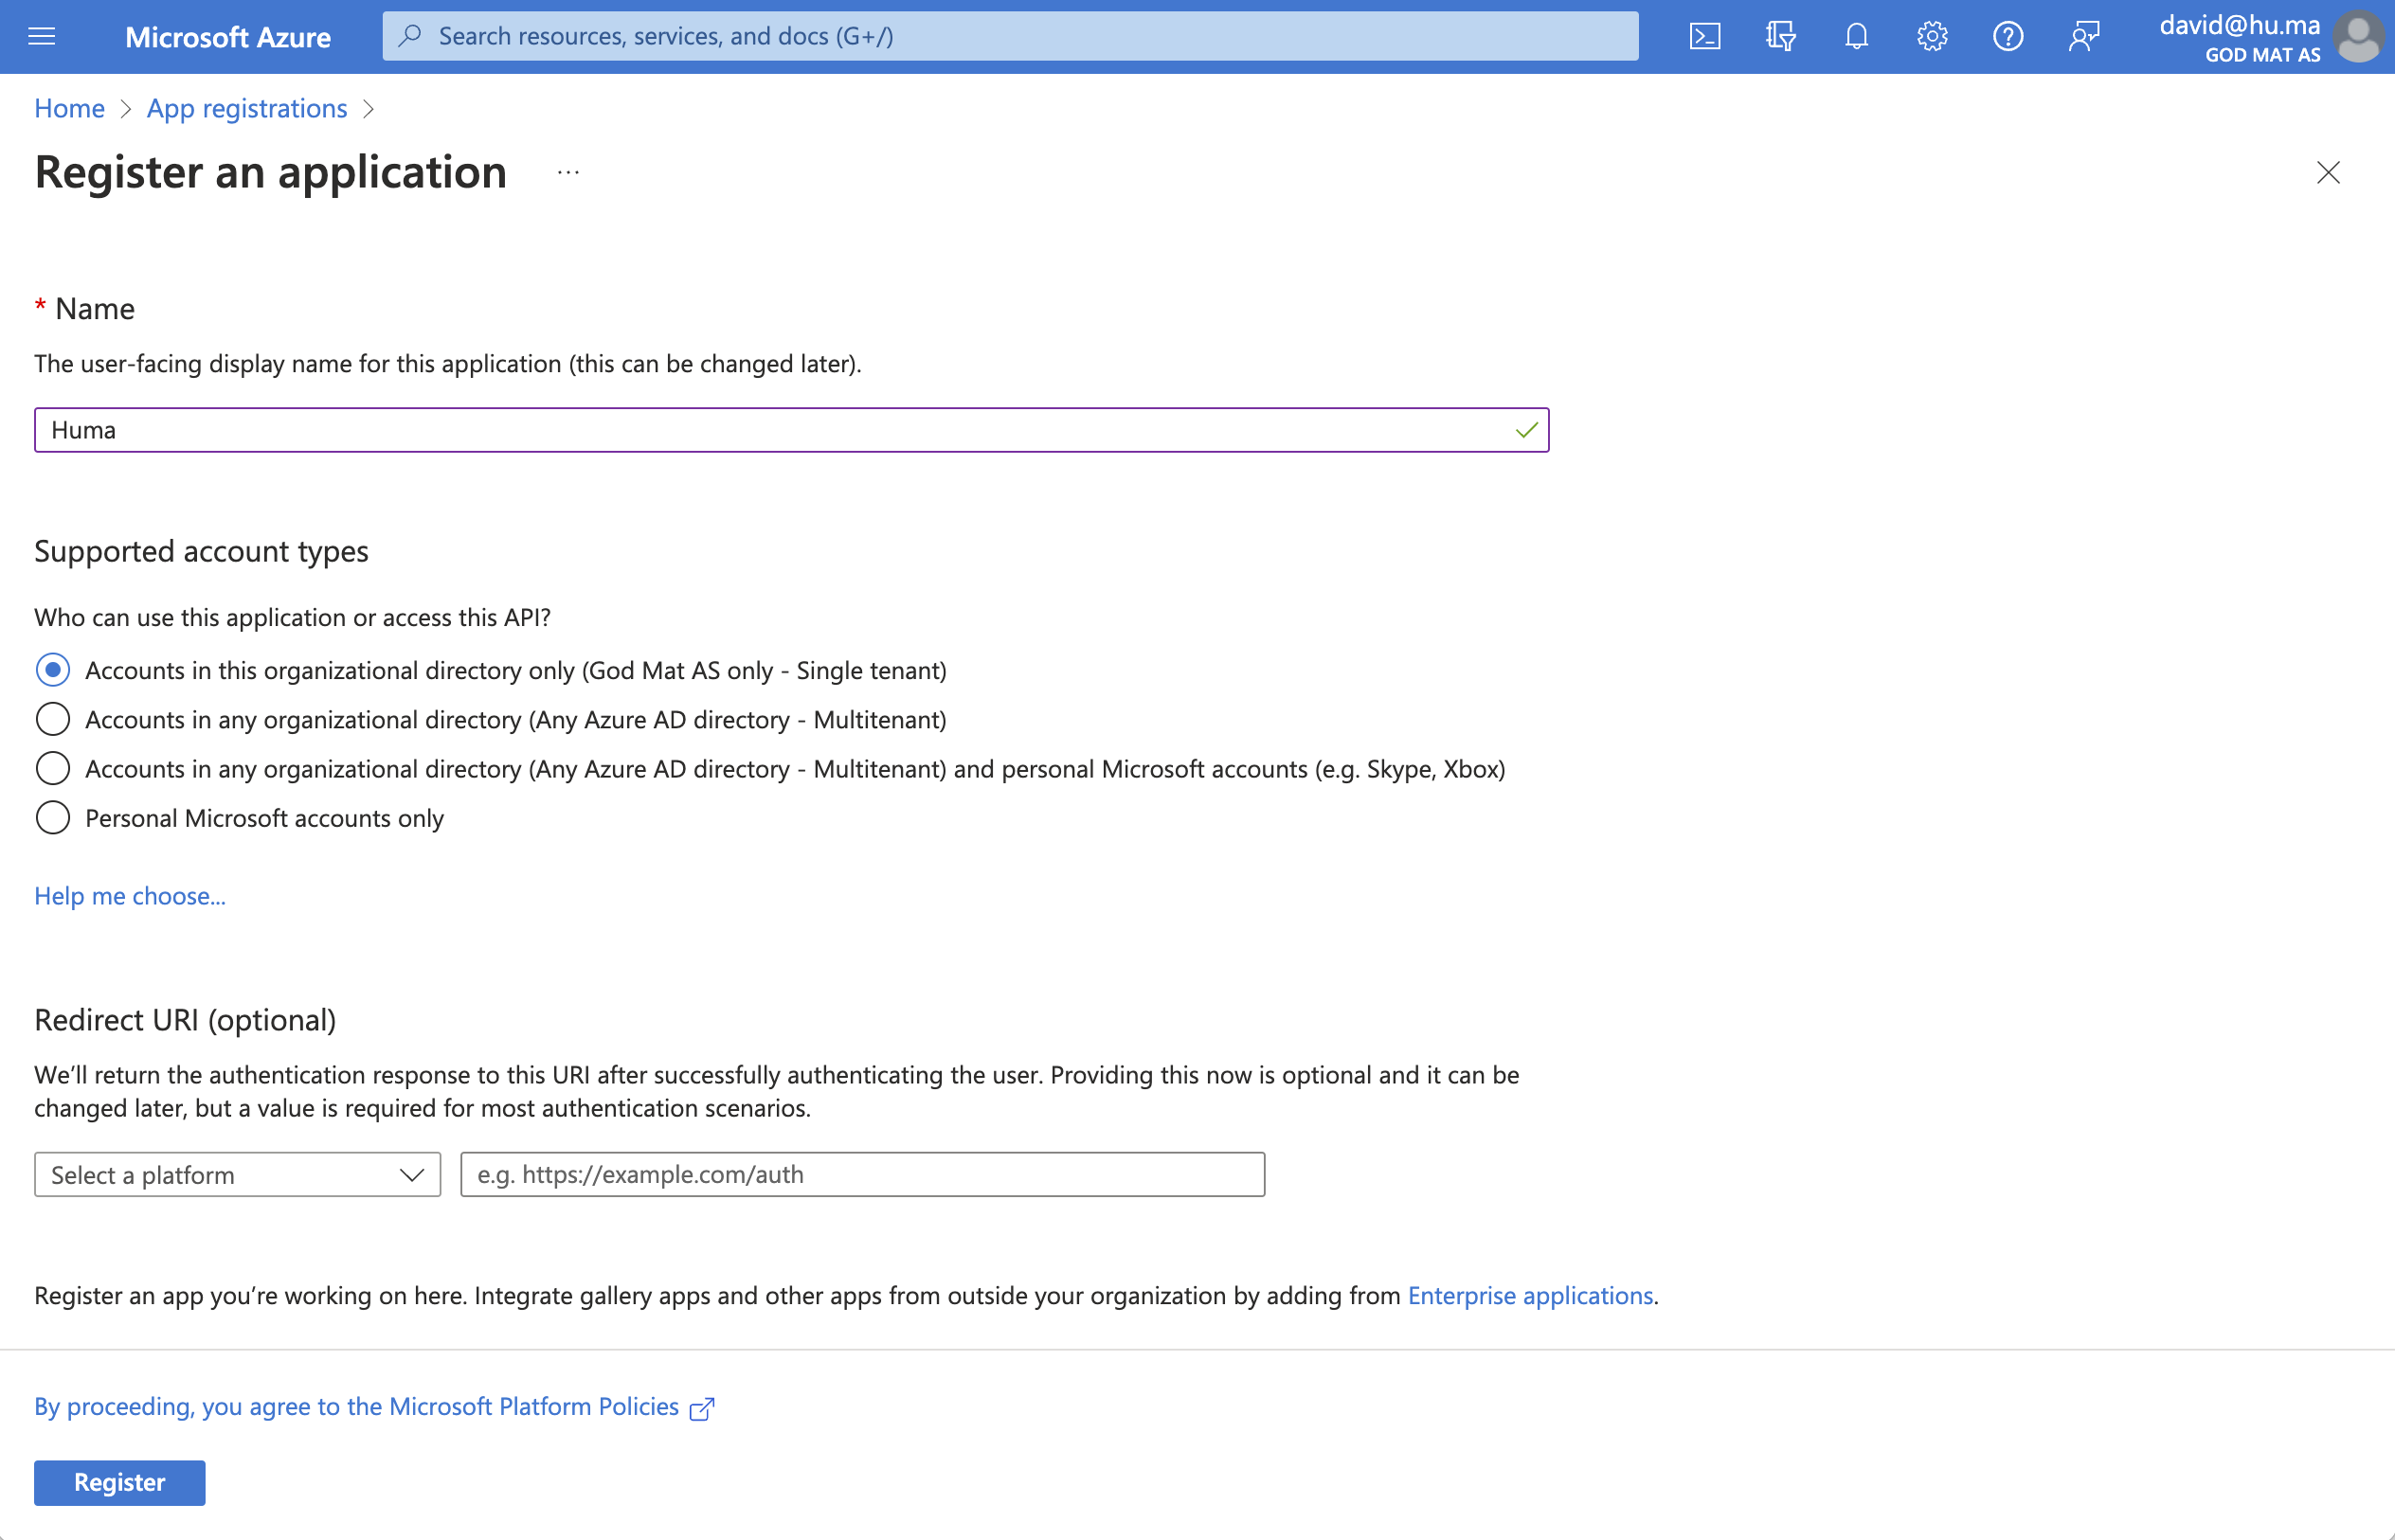
Provide a name for your app, for example, 'Huma'
-
In the 'Supported account types' section, select 'Accounts in this organizational directory only'
- 'Redirect URI'
- If you're connecting to Azure AD via 'Service to service' (Recommended):
- Leave the redirect URI field empty.
- If you're connecting to Azure AD via 'With user account':
- Choose 'Web' as the application type.
- Set the redirect URI to
https://auth.humahr.com/oauth
- If you're connecting to Azure AD via 'Service to service' (Recommended):
Read more about 'Service to service' and 'With user account' under Connect Huma to Azure AD
-
Finally, click on the 'Register' button.
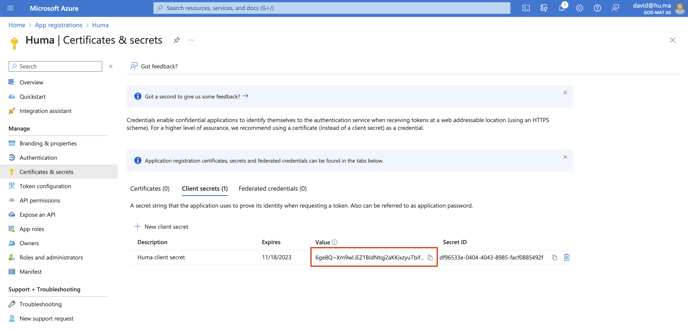
2. Create a Client secret key
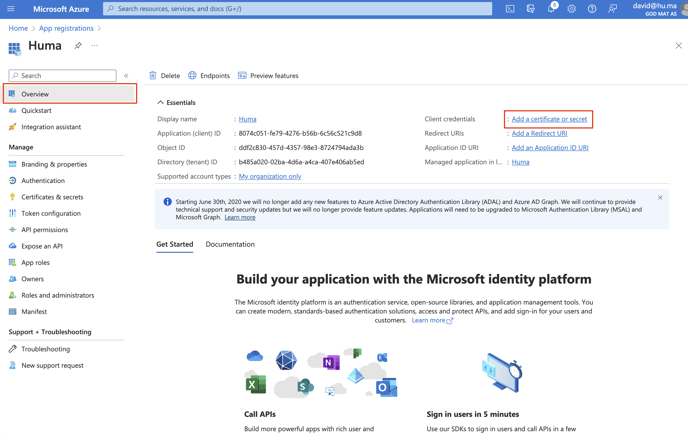
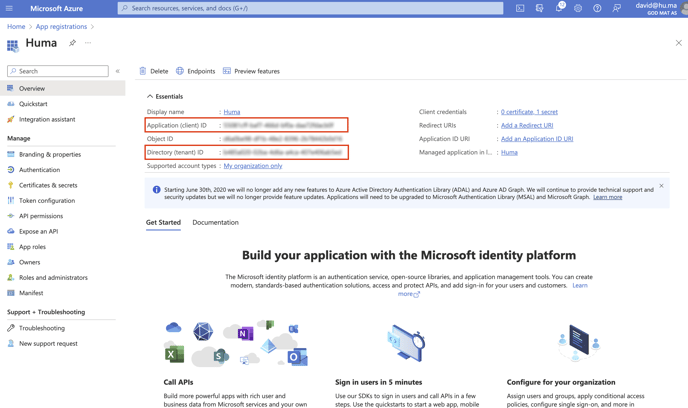
- In the 'Overview' page, click 'Add a certificate or secret'
- Click the 'New client secret' button
- Provide a name for the client secret, for example, 'Huma client secret'
- Choose an expiry period. After this period you need to create a new client secret and reconnect with Huma
- Click the 'Add' button
- Copy the 'Value' key and paste it somewhere. You will not be able to see this key after you navigate away from this page
3. Add API permission for your app
Adding API permissions is only necessary if you're using the authorization type 'Service to service'.
- Navigate to 'API permissions' and click the 'Add a permission' button
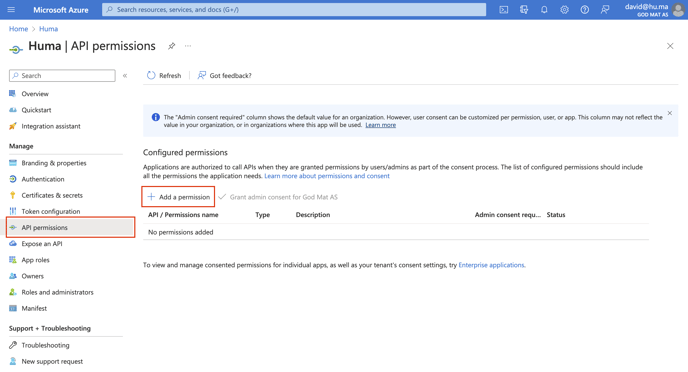
- Choose 'Microsoft Graph' and then 'Application permissions'
- Search for 'User' and open it
- Select 'User.ReadWrite.All' and click the 'Add permission' button
- Click the 'Grant admin consent for [your company]' button
4. Connect Huma to Azure AD
To access Integrations under System settings you'll need a System role with permissions to do Organization-wide settings. Read more here
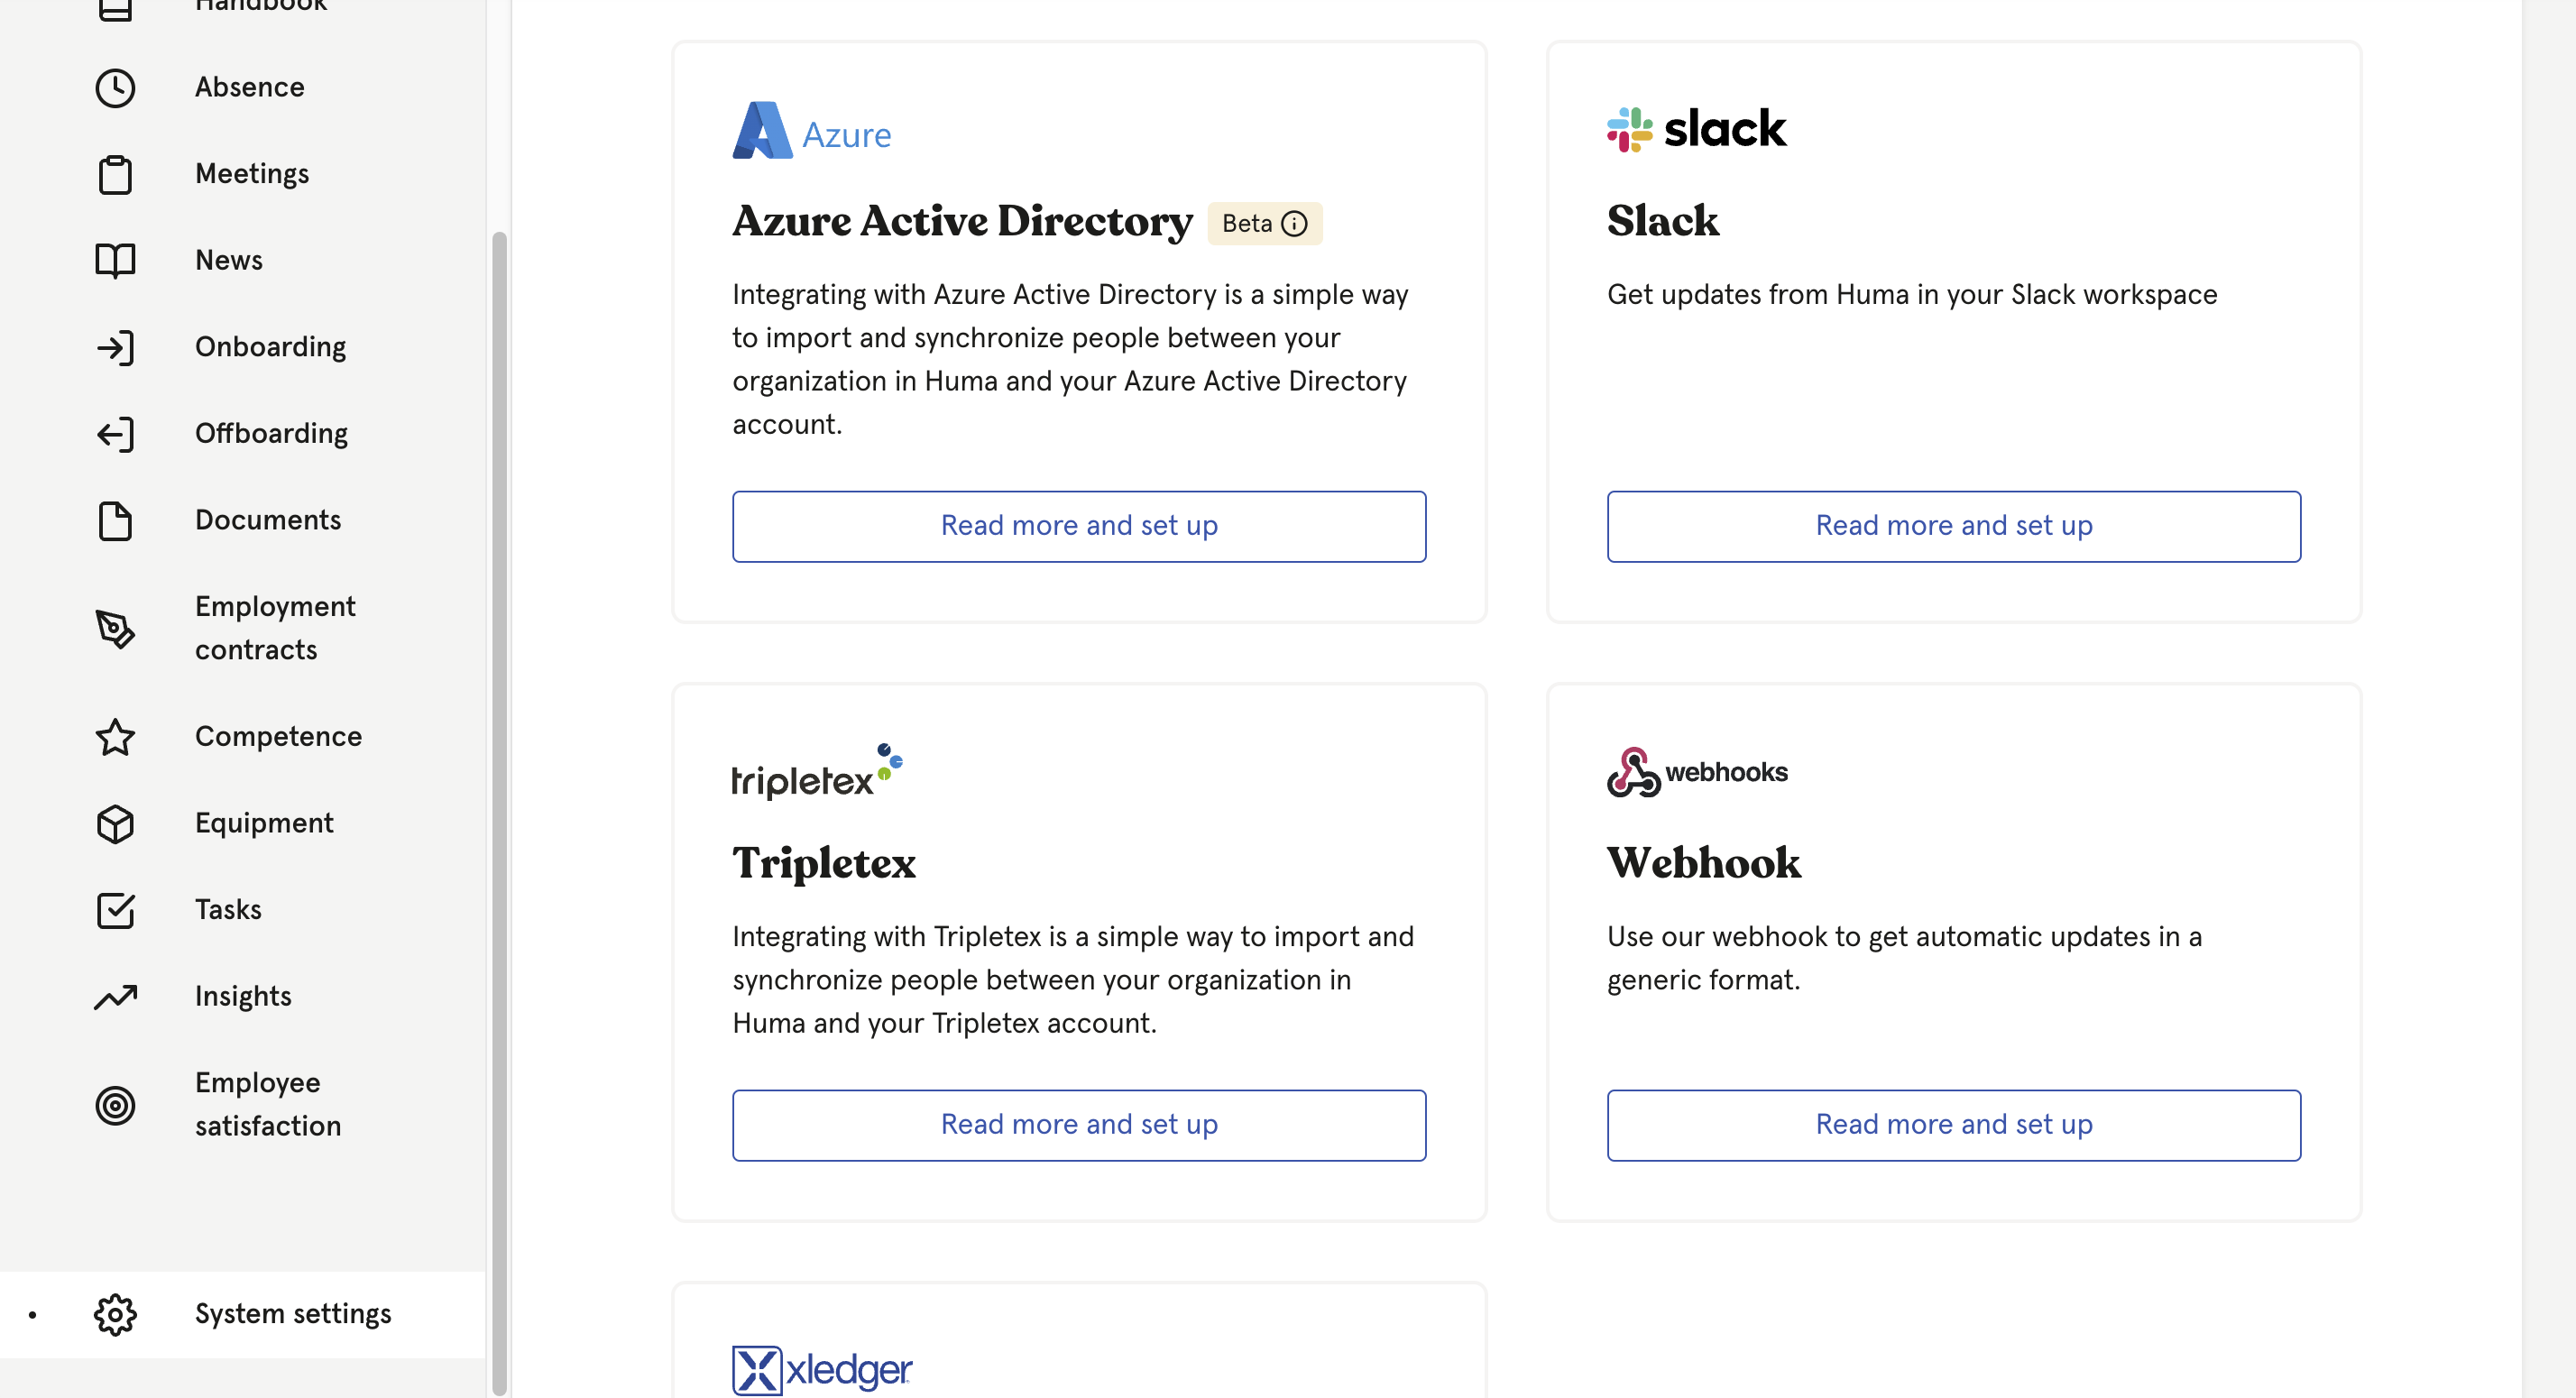
- Log in to your Huma organisation
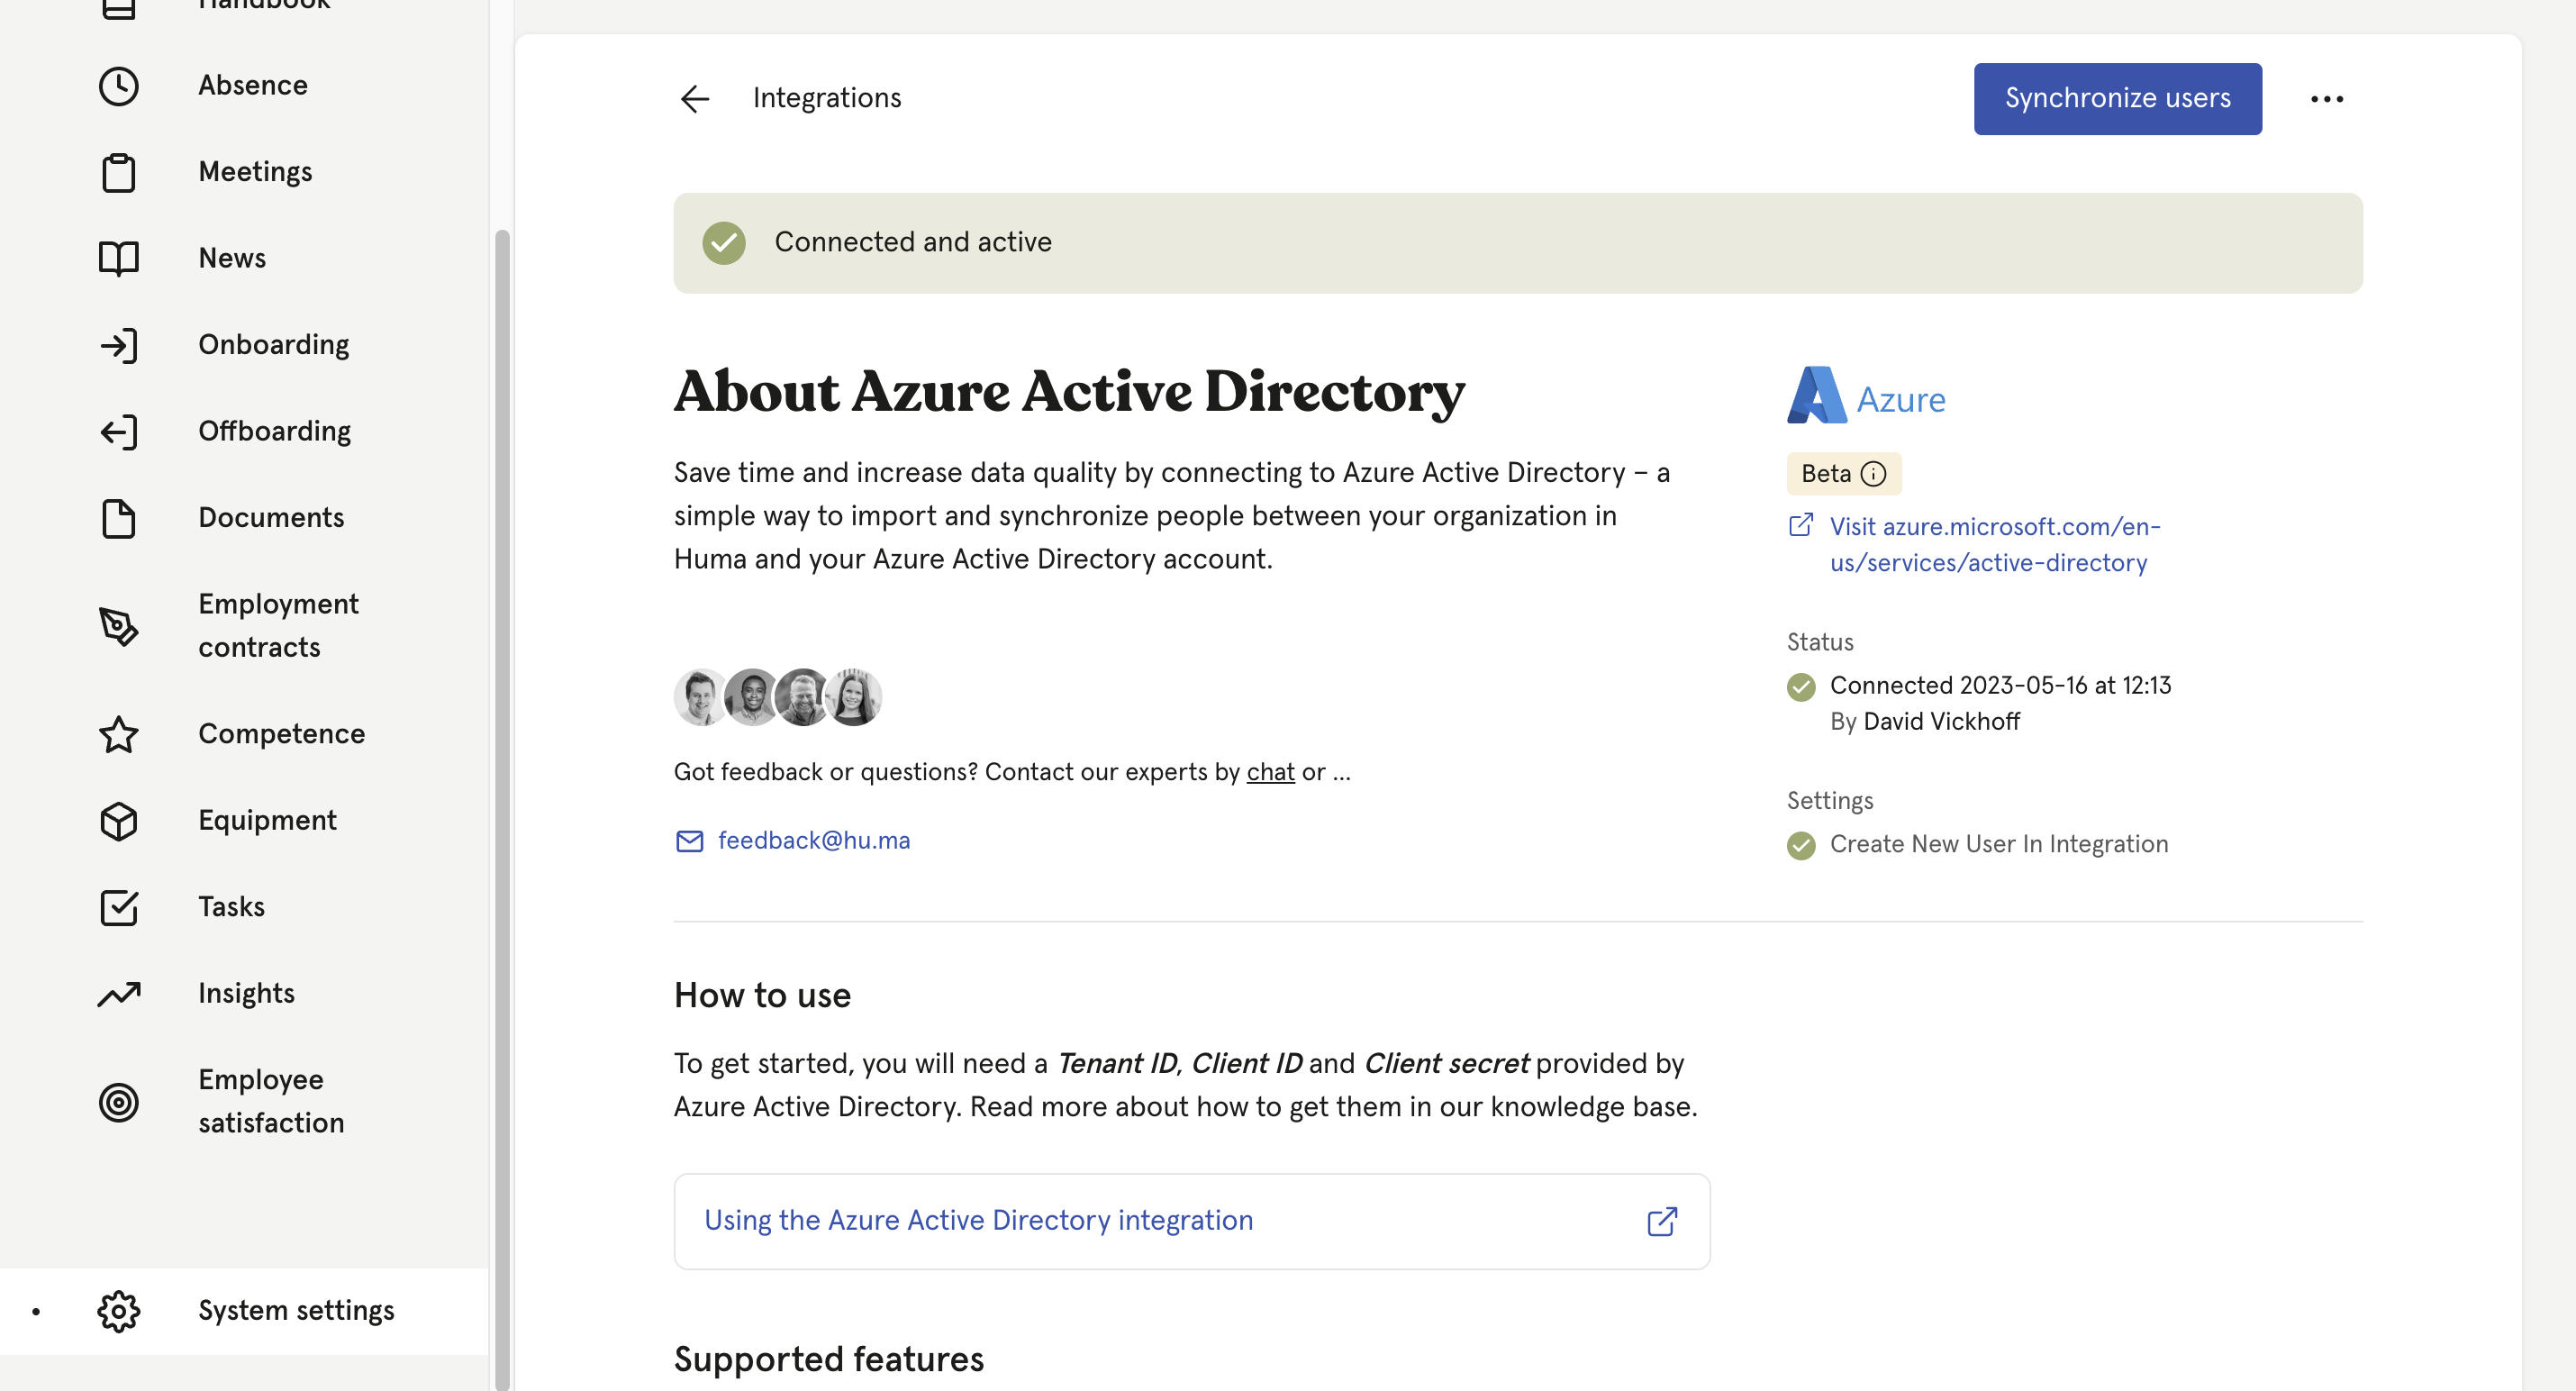
- Go to 'System settings' > 'Integrations' and choose 'Azure Active Directory'
- Please read all the information about the Azure AD integration before moving to next step.
- "How to use"
- "Supported features"
- "Supported fields"
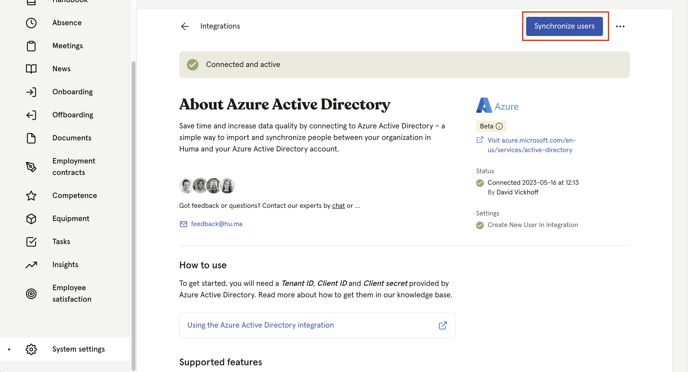
- Click 'Set up' in the upper right corner
- Choose which authorization type you want to use
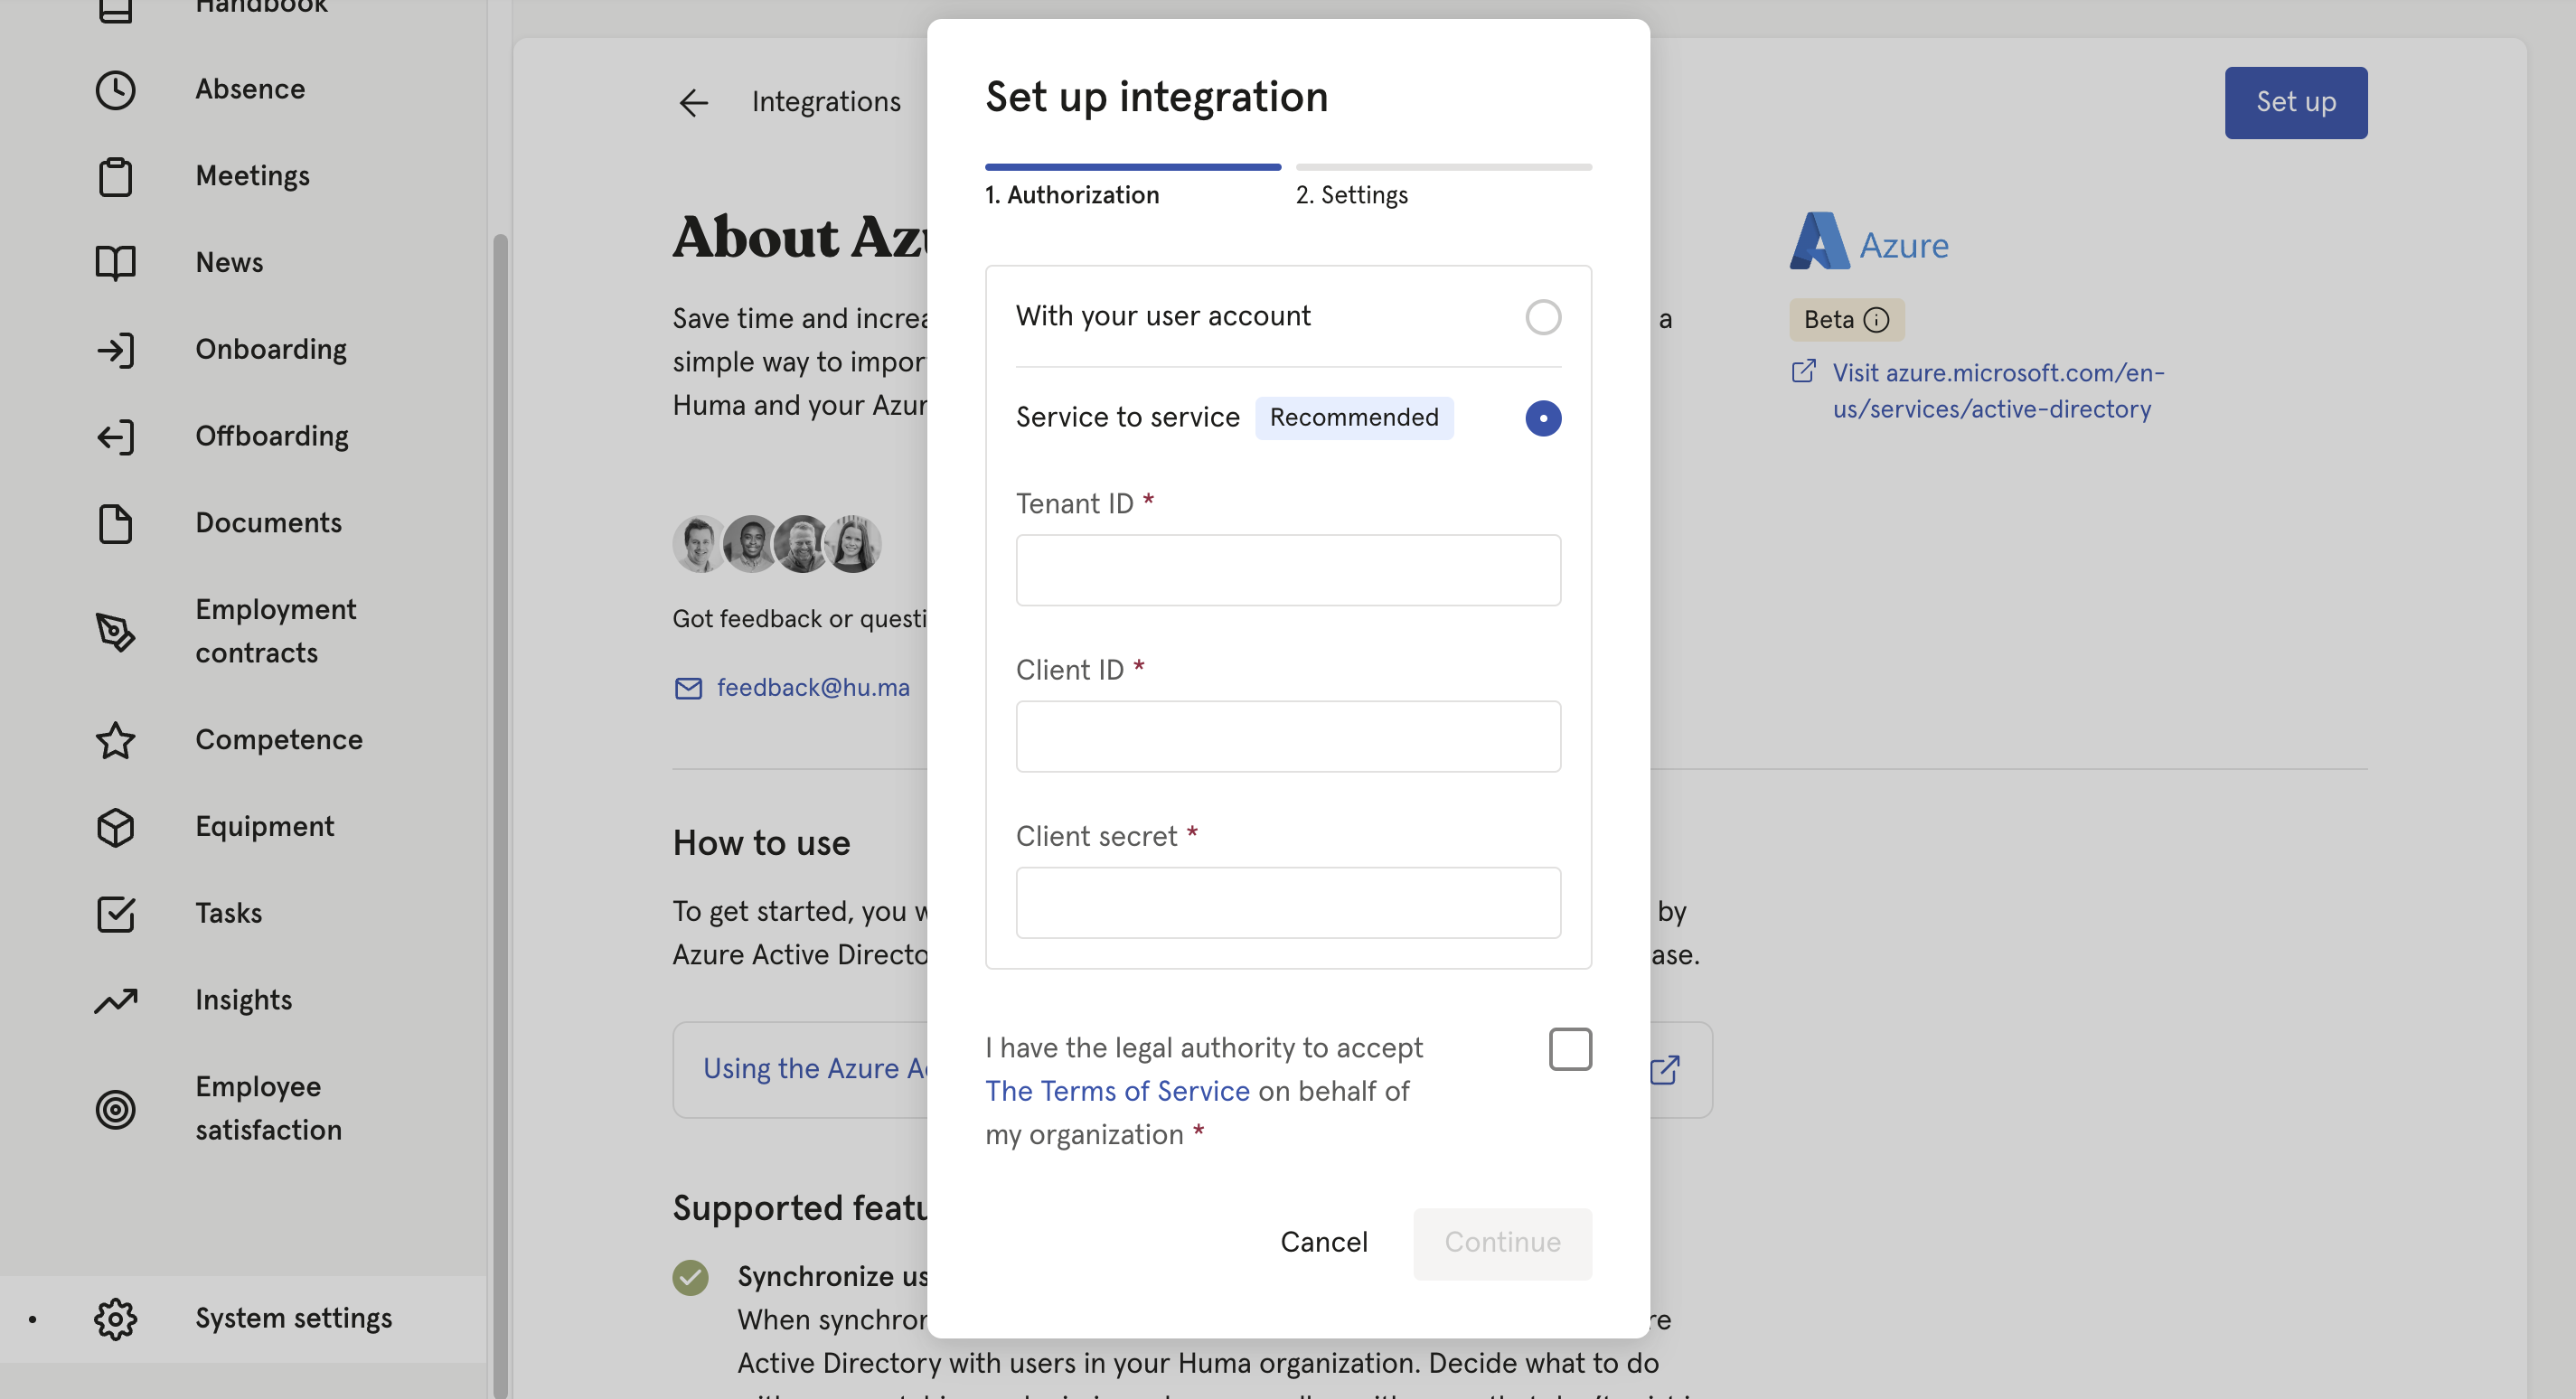
Authorization types
- Service to service (Recommended)
The authorization is connected to your Huma organization. - With your user account
The authorization is connected to the user who sets this up. If the user loses the User Administration role in Azure AD, the integration will stop working.
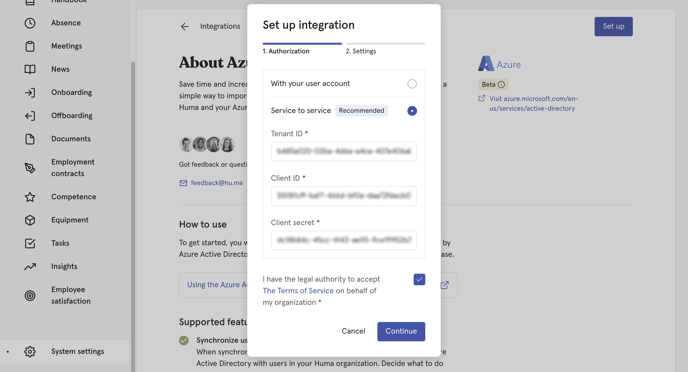
- Copy and paste the Tenant Client ID and Tenant ID which you will find at the 'Overview' page of your app in Azure
- Copy and paste the Client secret value key which you saved earlier. (If you didn't paste the value anywhere before, delete the client secret and create a new one) and click 'Continue'
- When adding users in Huma, you can choose if they should automatically be added in Azure AD. If you leave this inactive, you need to do a manual sync to add the user in Azure AD.
If you're using the Teamtailor integration, users added to Huma via that integration will also be added to Azure AD.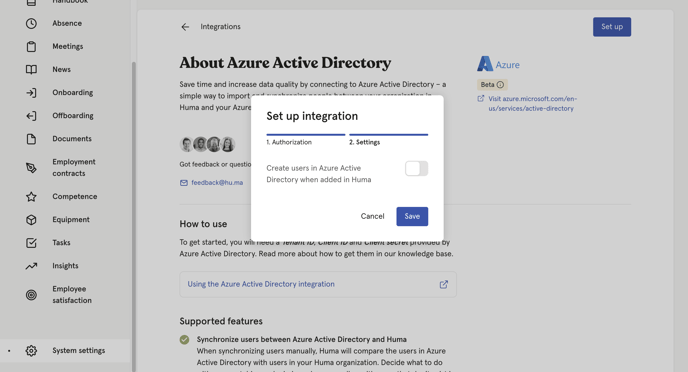
Click 'Save' and a connection is now established between the two systems. Now: On to the next step - it's where the magic happens.
5. Activate the integration. Synchronize users and choose how to handle conflicts or missing values
- After clicking 'Continue' you will end up in the Synchronize users step
- Huma will inform you of any conflicts or inconsistency between Huma & Azure AD and you will have to decide how to handle conflicts and/or missing values. You can decide wether or not you want to update Azure AD based on values in Huma or the other way around.
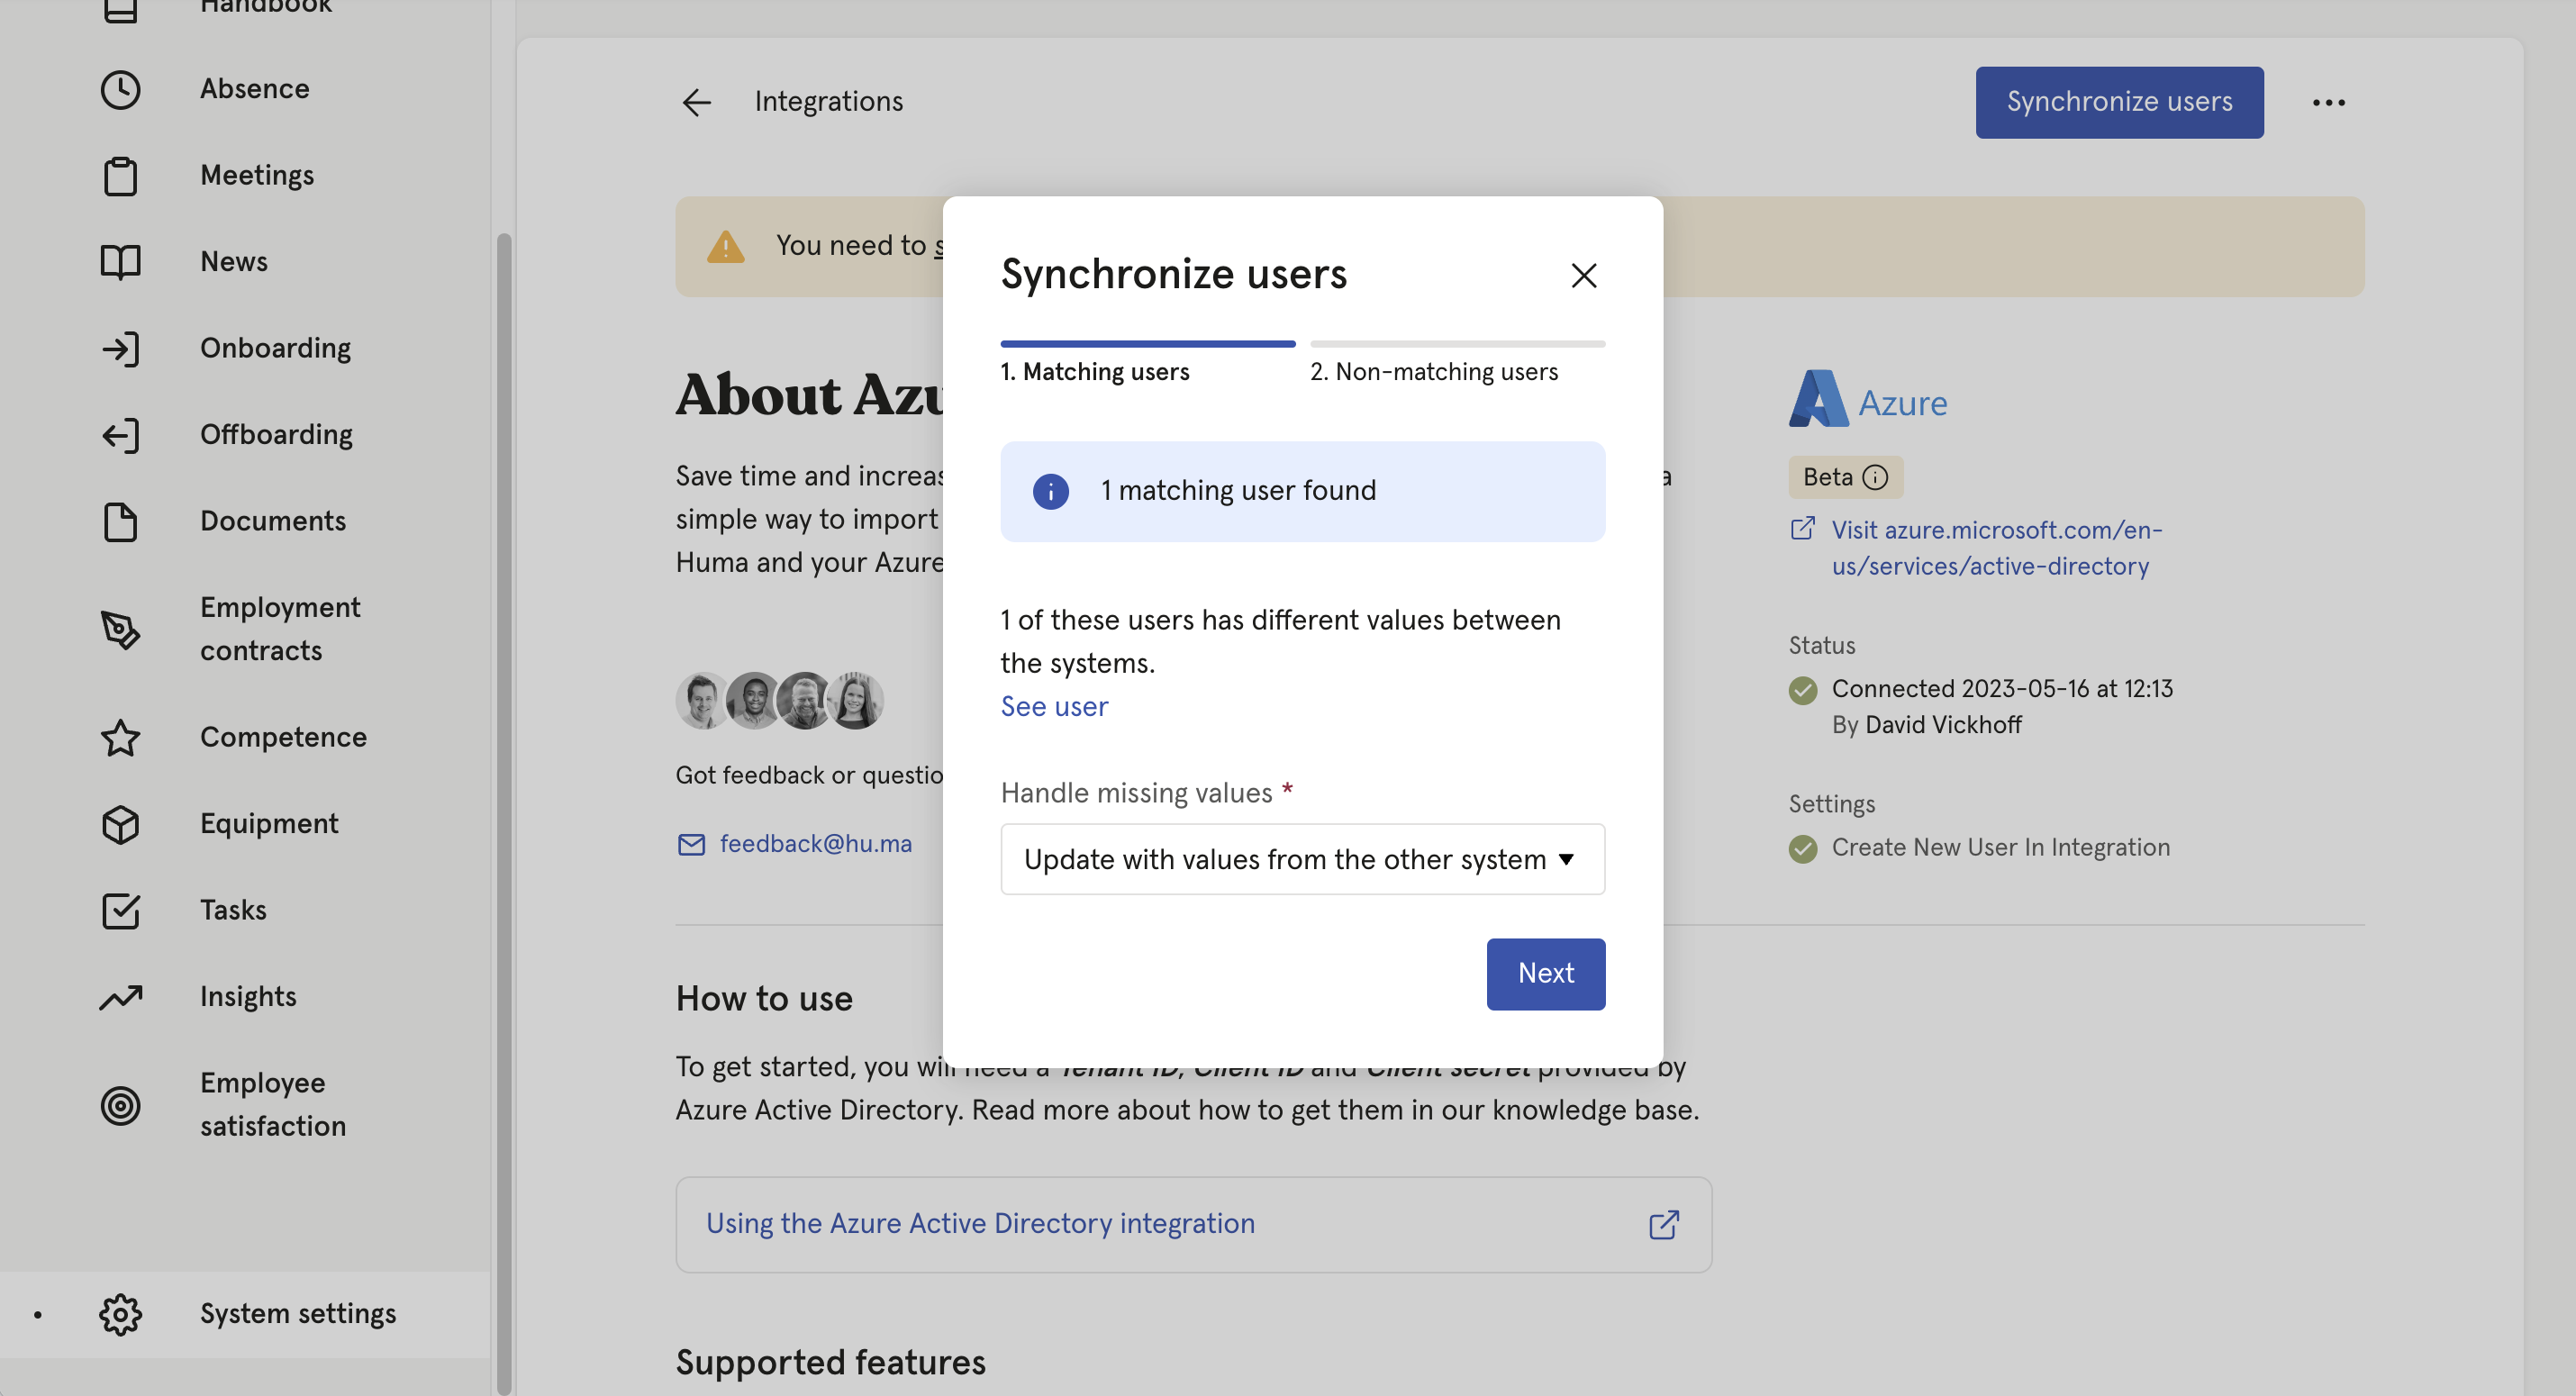
- Click 'Next' and decide which users you want to create in Huma & Azure AD.
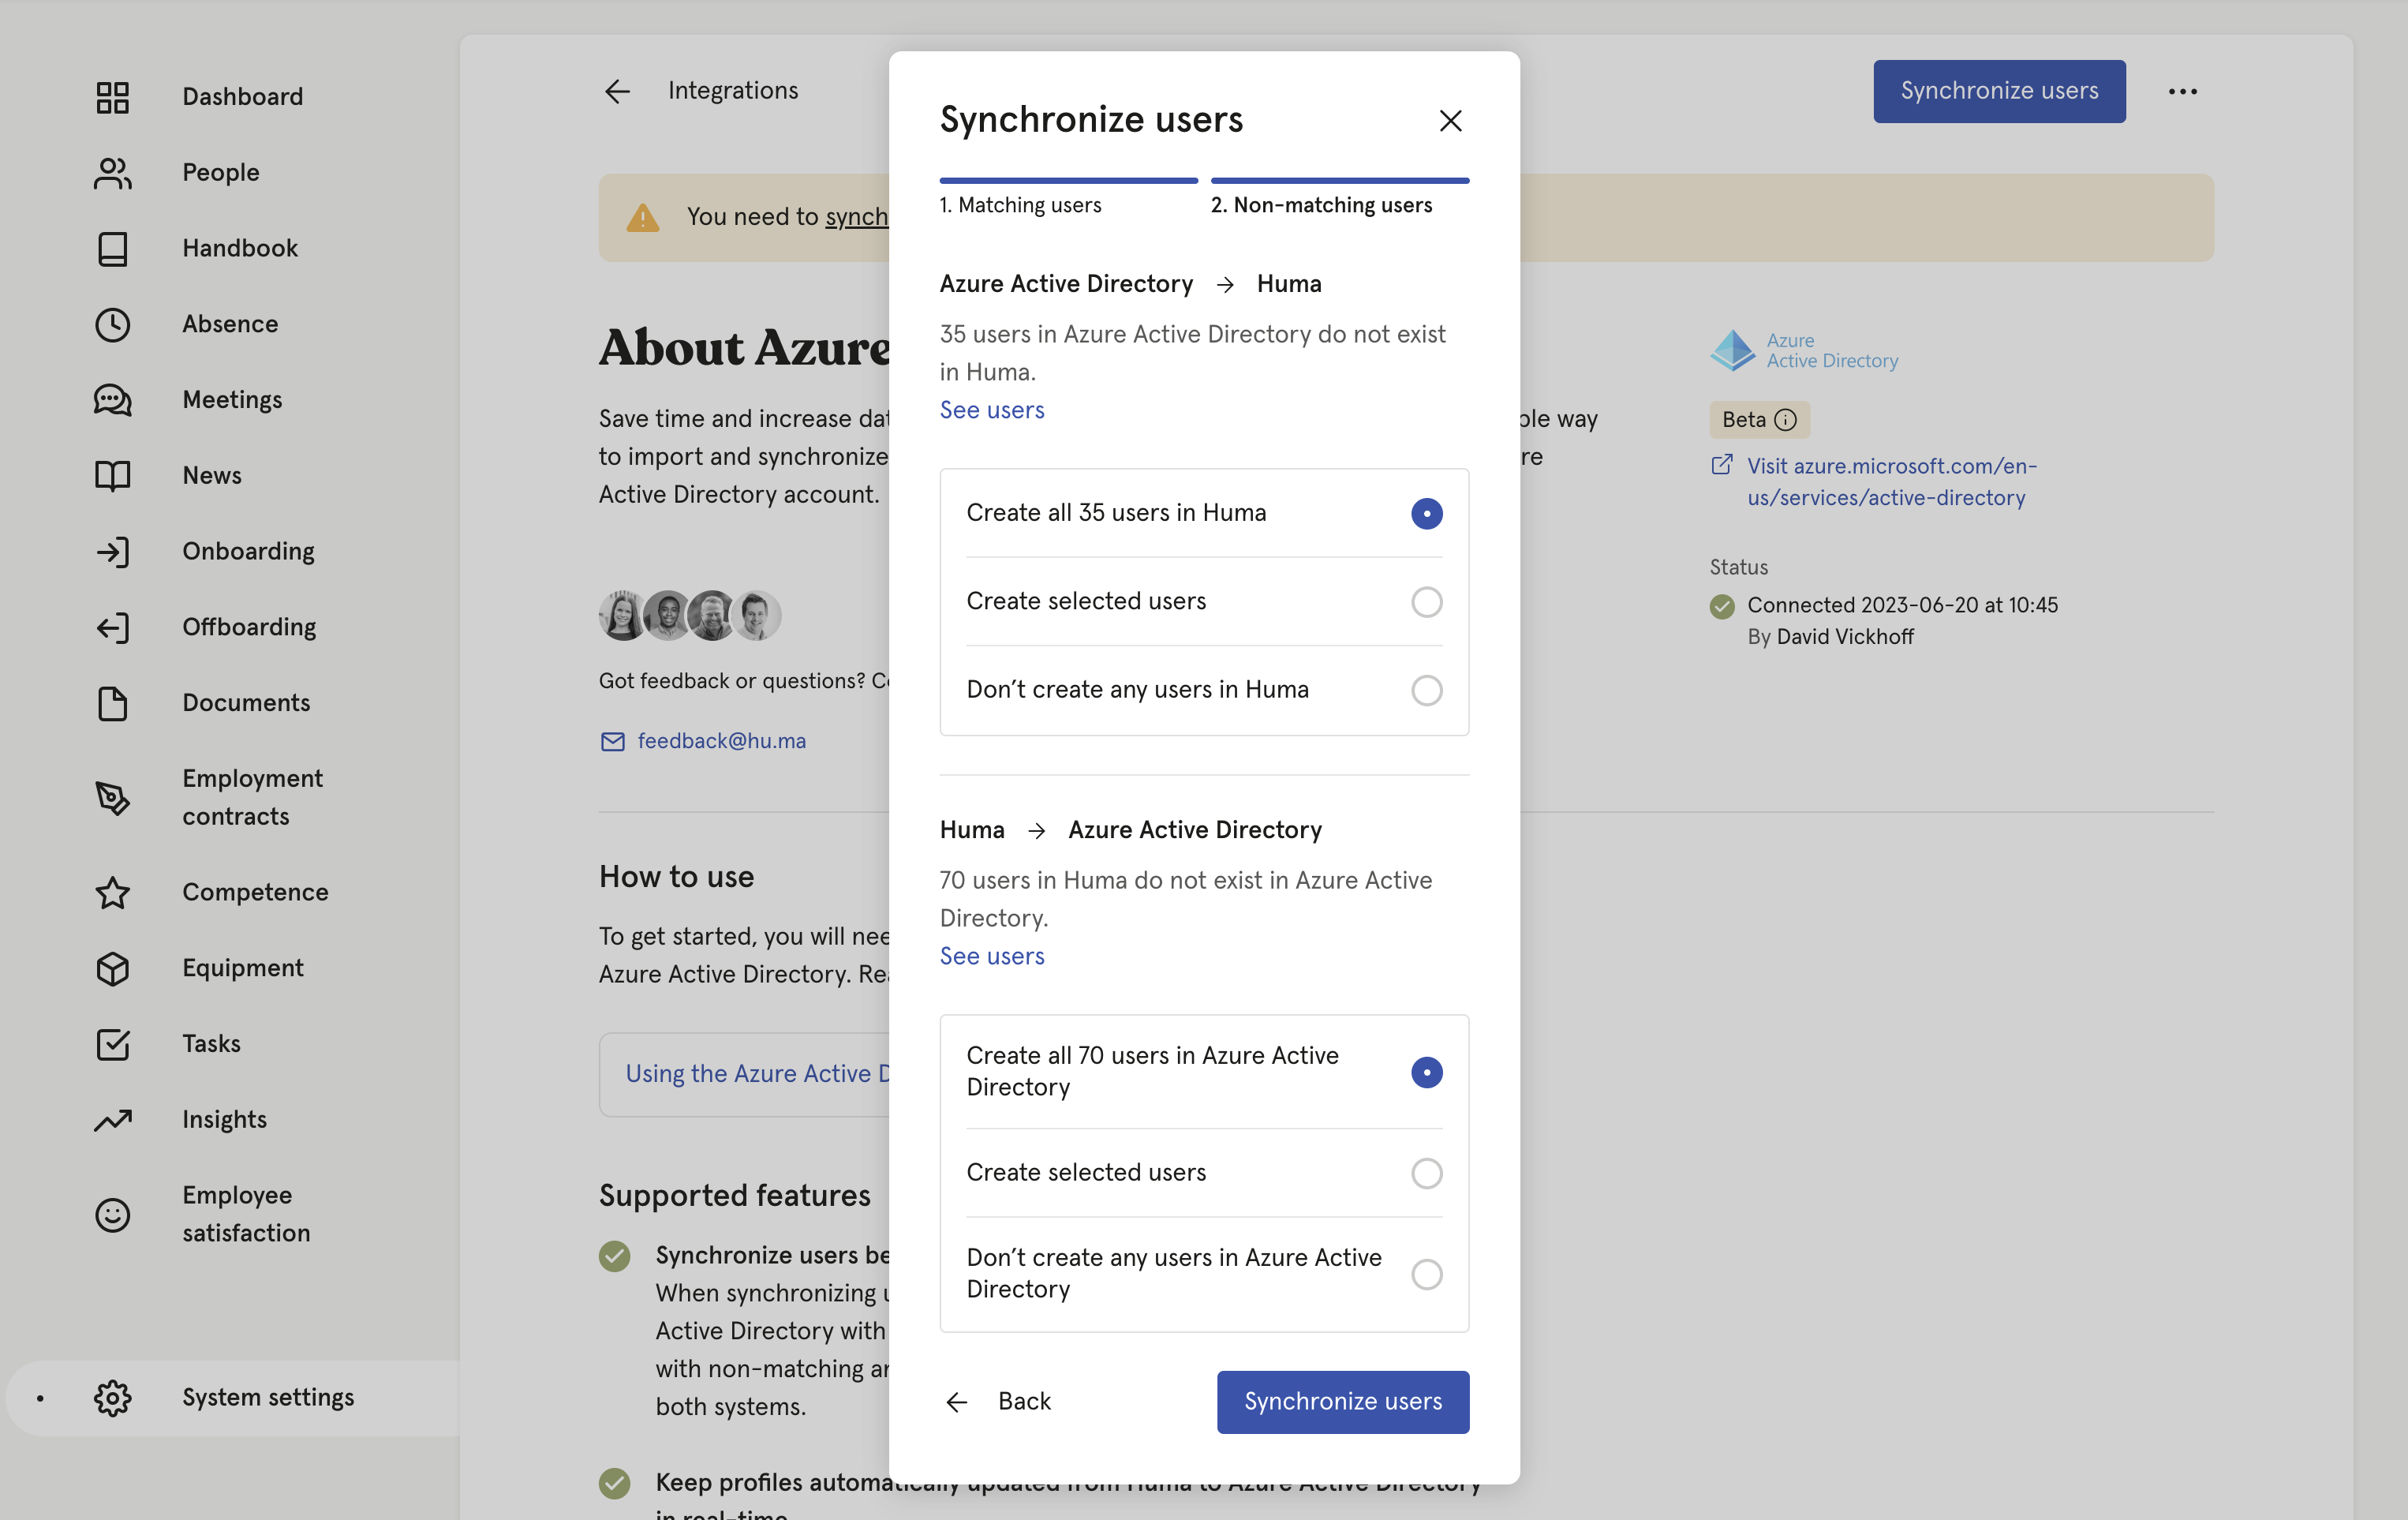
- If users in Azure AD does not exist in Huma, you can add users to Huma
- If users in Huma does not exist in Azure AD, you can add users to Azure AD
- After deciding on the above click 'Synchronize users'
- Huma will now start synchronizing users with Azure AD. You will receive an email confirming the result.
4. Your connection between Huma and Azure AD is active 🥳
Any changes made to supported fields in Huma (listed below) will be automatically updated in Azure AD in real-time.
Please be aware that you need to sync users to get the latest changes from Azure AD. Changes made in Azure AD will not be automatically updated in Huma.
How to synchronize users manually
If you want to synchronize users manually you can always click 'Synchronize users'
Currently supported fields
The country field on the user in Azure must be in the ISO 3166-1 alpha-2 format (NO, SE, FI). If not, the Address field will not be synced to Huma.
- Employment ID (Note: The integration can't update this field's value in Azure Active Directory with the value in Huma. Huma requires this field's value to be unique)
- Given name (*REQUIRED!)
- Family name (*REQUIRED!)
- E-mail (*REQUIRED! Huma requires this field's value to be unique)
- Phone number (Note: Huma requires this field's value to be unique)
- Address
- Street address
- Postal code
- City
- Country
- Job title
- Employment start date